Tools of the trade One of the essential tools for the retrocomputing hobbyist is a disk imaging computer. The machine is used to write disk images to physical media, as well as to archive existing disks. Unless a dusty old pile of floppy disks comes with the vintage computer, a disk imaging workstation is needed to get the machine running when it's "cold metal" with no software or OS available. The approach to making new disks depends on the target vintage hardware. I've focused my efforts on Apple IIs, CP/M machines (an IMSAI 8080 and Osborne luggables), a TRS-80 model III, and early compact macs. Here, I describe my disk imaging workstation that reads and writes FM and MFM encoded disks for my IMSAI, Osborne, and TRS-80 machines. It reads and writes 5.25" and 8" soft sectored disks using Dave Dunfield's ImageDisk program. Apple computers use a GCR encoding scheme, and the disks are incompatible with FM and MFM formats found on CP/M and later PC systems. In this case, tools like ADT-Pro can be used to bootstrap a machine over the serial port and use the computer to write an initial disk, then transfer subsequent images. The imaging computer can be any modern or less modern computer with a serial port (including USB) that can run the ADT-Pro software. For early Macs, no such tools are available. For these, I've used a "string" of machines with overlapping capabilities, for instance, by writing an OS 6.0.8 disk image to a G4 Mac that could boot OS 9, transferring it to an ethernet-equipped LC III via AppleTalk, which was then used to write the 720K 3.5" boot disk for a Mac Plus. A disk imaging computer is a bit of a retrochallenge in its own right. While some modern hardware exists for reading and writing old disk formats on aging hardware, a straightforward and pretty inexpensive approach (aside from your time and [dis]inclination towards acquiring more stuff) is to use a machine that hasn't quite reached a vintage state. My disk imaging workstation is a Gateway 2000 Pentium 166 running Windows 98. Gateway 2000 P5-166 I started with an old PC that was pulled from a dusty storage area at work. The machine had the following installed:
My target disks were initially 5.25" single-sided, single and double density, so I needed an appropriate disk drive. Luckily, I found a 360K TEAC FD-55BV-221-U half-height drive (S/N 390676) in the same storage closet as the PC. The machine was packed with dust. I cleaned it out and unseated / reseated the memory. The initial boot resulted in 3 beeps (bad RAM) but reseating the RAM allowed it to boot through the memory check up to “keyboard not attached”. The PSU checked out at about +5V (actual 5.2) and +12V (actual 11.8). The power switch does not make a great contact. The plastics are brittle and yellowed. After finding a PS/2 keyboard and mouse on a high, forgotten shelf at work, I could boot into BIOS, but booting to the HD seemed to cause issues (hang or maybe I wasn’t patient enough). BIOS had the correct date (!) which means that the battery had kept the clock going. It had lost about 10 minutes in the span of almost 20 years. The machine's FDC is an "IBM PC/AT, PC/XT, PS/2, Plug-and-Play (PnP) Compatible Ultra I/O Controller with Super I/O, Keyboard Controller and Real Time Clock". Sounds awesome. Using Dunfield's TESTFDC program, I confirmed that it could read and write single-density (FM output) at 250 kbps and double-density (MFM) at 250 kbps disks with the TEAC drive. At some point, I'll have to add some info on:
Writing images with the ImageDisk program (as well as archiving disks to images) is straightforward and Dunfield provides a number of tools for working with the resulting "IMD" files, including a viewer / editor and utilities for converting to other formats. 8" drive adapter To use the 8" Shugart 800 drives with the imaging computer, I wired a 34pin-50pin adapter. According to Dunfield's notes on connecting 8" floppies to PCs this requires: PC(34p) 8"(50p) Description 2 TG43 (see below) 8 20 Index 12 26 DS1(PC) -> DS0(8") 16 18 Motor ON/Head Load 18 34 Direction (see below) 20 36 Step 22 38 Write Data 24 40 Write Gate 26 42 Track 0 detect All Odd numbered 28 44 Write Protect pins are GROUND 30 46 Read Data 32 14 Side1 Select 34 12 Ready My understanding is that the Shugart 800 automagically switches the write current at track 43. Other drives may need to have this signal provided by the controller. My initial attempt to write disks failed. The drive head jerked back and forth rapidly. Then I realized that I had forgotten to wire the grounds together on my adapter. After correcting this oversight, I was able to write two images to two 8" disks. The connector isn't pretty, but it gets the job done. 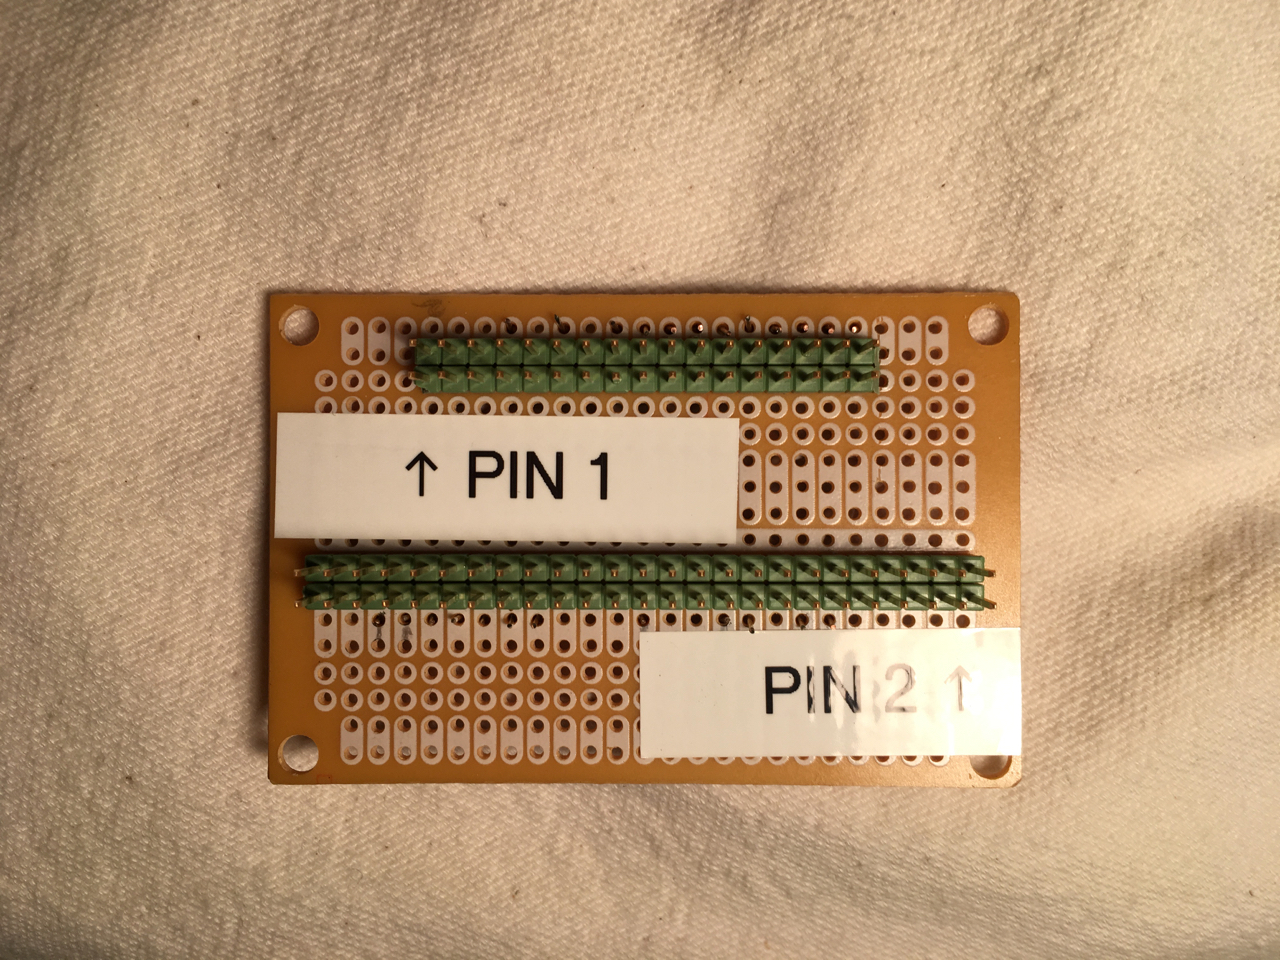 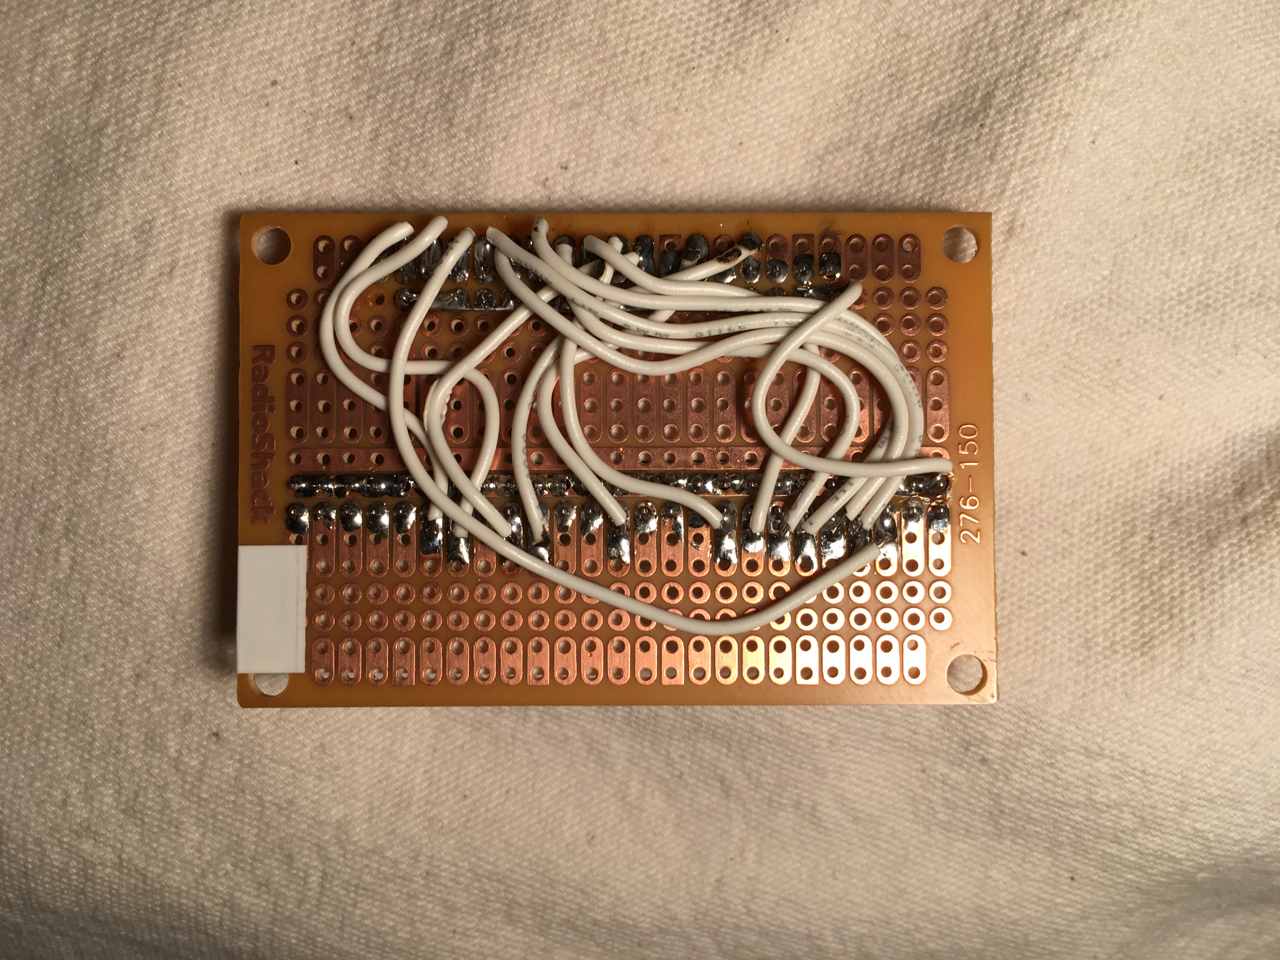 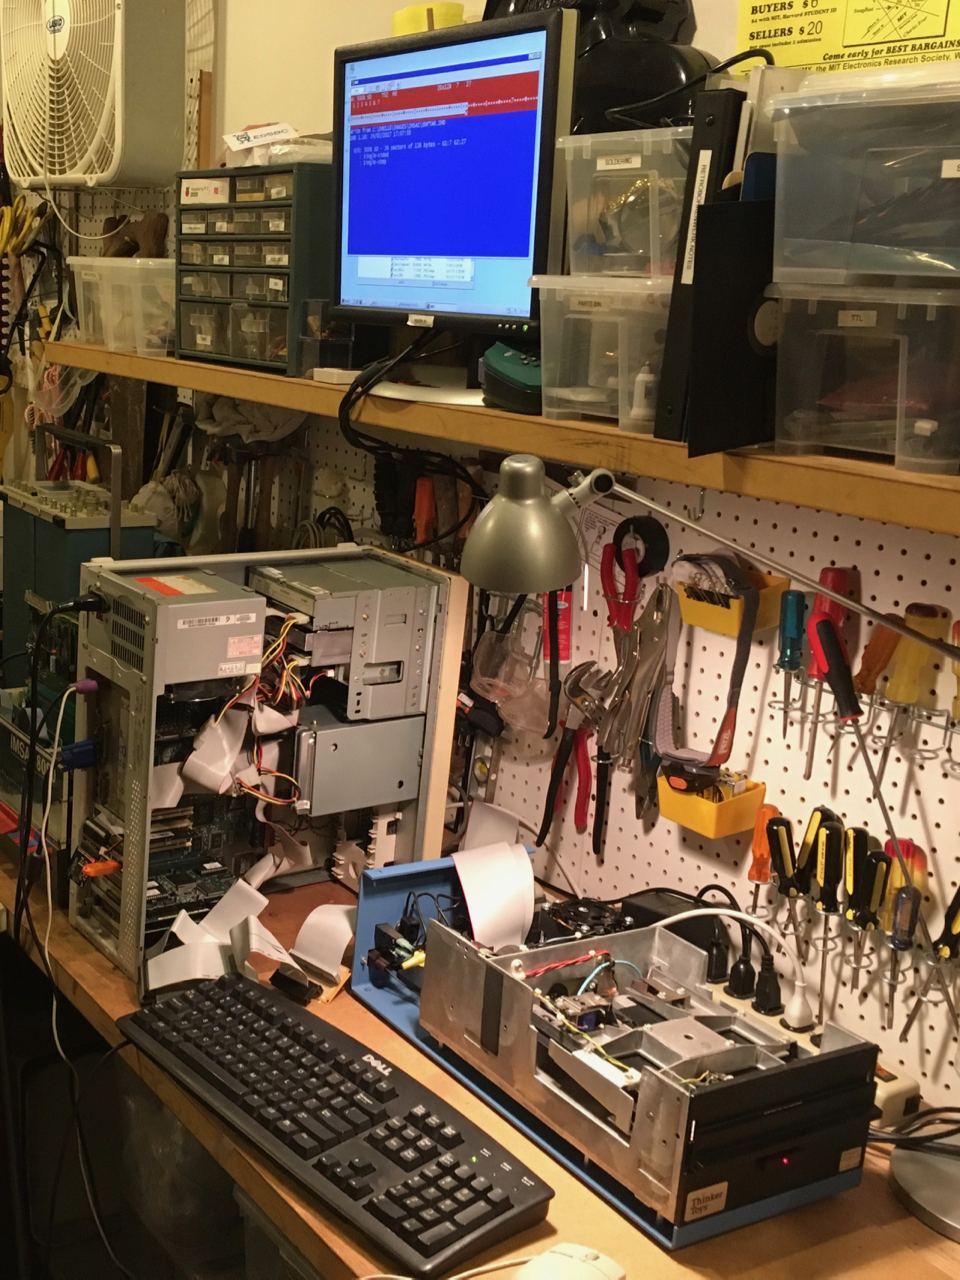 The Shugart 800 drive is about 2/3 the size of the PC, and probably weighs more. |